EMC PowerPath Virtual Appliance:
- is installed separately from the EMC PowerPath/VE for VMware vSphere multipathing product
- provides a simplified RTOOLS deployment
- provides enhanced license management
- provides REST API to retrieve content from PowerPath
EMC PowerPath Virtual Appliance 2.0 has been released:
- PowerPath Virtual Appliance 2.0 Release Notes
- PowerPath Virtual Appliance 2.0 Installation and Configuration Guide
The high-level upgrade procedure is as the following:
- Export EMC PP VA 1.2 configuration to a file using the script;
- Deploy new EMC PP VA 2.0
- Import the configuration file
Here are the detailed steps:
- Download PowerPath_Virtual_Appliance_2.0_Package.zip package from EMC Support Portal;
- Unzip the
export_vApp1.x_Configscript from and then copy it to the EMC PowerPath VirtualAppliance 1.2 VM; - SSH into the EMC PowerPath Virtual Appliance 1.2 VM and then run the script to export the EMC PowerPath Virtual Appliance 1.2 configuration.
login as: root
Using keyboard-interactive authentication.
Password:
Last login: Wed May 13 10:55:02 2015
epp001:~ # cd /tmp
epp001:/tmp # chmod +x export_vApp1.x_Config
epp001:/tmp # ./export_vApp1.x_Config
[2015-05-13 11:59:01,390] Copying vCenter servers in vcenterserver.xml file.

[2015-05-13 11:59:01,466] Moving vcenterserver.xml file in current folder.
mv: `/tmp/vcenterserver.xml' and `./vcenterserver.xml' are the same file

[2015-05-13 11:59:01,471] Creating zip archive.
zip warning: name not matched: /etc/emc/*.lic
adding: SERVED_142261213XXXX.lic (deflated 25%)
adding: vcenterserver.xml (deflated 24%)
adding: deployment_params.properties (deflated 28%)

Virtual Appliance Deployment Parameters
=======================================
Host name      : epp001.vstrong.local
Search Domain  : vstrong.local
NTP Server     : 10.100.1.1,10.200.1.1
IP             : 10.100.168.88
Gateway        : 10.100.168.254
Subnet mask    : 255.255.255.0
DNS Server     : 10.100.100.1,10.200.100.1
- Copy the resulting
vApp1.x_Config.zipfile to the local desktop or a remote location. - Take note of the EMC PowerPath Virtual Appliance deployment parameter details.
The parameters are not copied from EMC PowerPath Virtual Appliance 1.2 for security reasons and therefore requires manual re-entry in EMC PowerPath Virtual Appliance 2.0.Virtual Appliance Deployment Parameters ======================================= Host name : epp001.vstrong.local Search Domain : vstrong.local NTP Server : 10.100.1.1,10.200.1.1 IP : 10.100.168.88 Gateway : 10.100.168.254 Subnet mask : 255.255.255.0 DNS Server : 10.100.100.1,10.200.100.1
- Power down the EMC PowerPath Virtual Appliance 1.2 VM.
NOTE: Do not delete the EMC PowerPath Virtual Appliance 1.2 VM until after successful EMC PowerPath Virtual Appliance 2.0 import. - Deploy EMC PowerPath Virtual Appliance 2.0 with the same EMC PowerPath Virtual Appliance Deployment Parameters (see step 5) as EMC PowerPath Virtual Appliance 1.2.
- Power up the EMC PowerPath Virtual Appliance 2.0 VM.
- Configure EMC PowerPath Virtual Appliance 2.0 VM:
- Enable VMware Tools
Run/opt/ADG/etc/init.d/check-vmware-tools
This script configures VMware Tools and starts it.epp001:~ # /opt/ADG/etc/init.d/check-vmware-tools Vmware Tools Version - 9.4.0 build-1280544 Configuring VMware Tools for Linux Kernel - 3.0.101-0.46-default... Initializing... Making sure services for VMware Tools are stopped. Stopping VMware Tools services in the virtual machine: Guest operating system daemon: done Unmounting HGFS shares: done Guest filesystem driver: done {skipped} You can now run VMware Tools by invoking "/usr/bin/vmware-toolbox-cmd" from the command line. {skipped} VMware Tools configuration successful.
- Enable VMware Tools
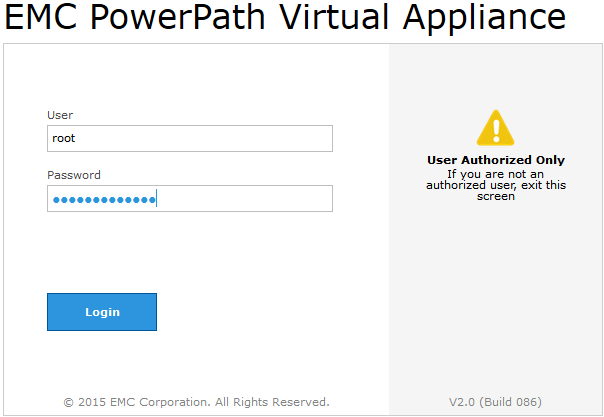
- Open EMC PowerPath Virtual Appliance web console, observe nice new interface and login
- In the 2.0 PowerPath Virtual Appliance web console, navigate to System > Settings > Import Backup File and then import the
vApp1.x_Config.zipfile.
BTW, you may need to refresh the web console window to be able to click on System
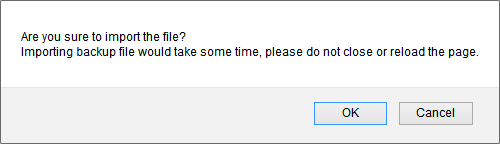
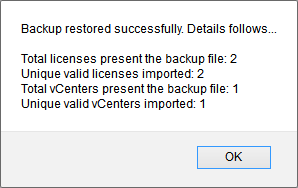
Click OK to confirm you are sure to import the file. - Backup successfully restored
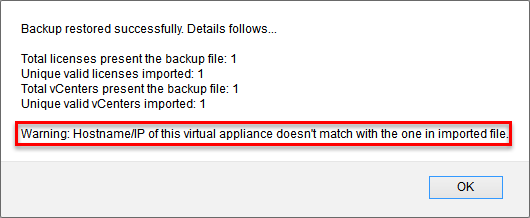
When I re-deployed the EMC PowerPath Virtual Appliance, I changed the host name and therefore I got a warning:
- Navigate back to PowerPath Licenses and confirm the license assignment
In one of my environments, the license assignment got lost and all hosts were reported as unlicensed. Navigate to Inventory > VCenter Servers, highlight the vCenter and click on Repoll ESX Hosts button. - After you finish
- After successful import, EMC PowerPath Virtual Appliance 1.2 can be deleted.
- Reboot is not required after upgrades using the upgrade script.
Hope this will help.
Recent Comments